Dragon Anywhere Mobile Support
Getting started with Dragon Anywhere Mobile
Now you’ve downloaded Dragon Anywhere Mobile, get started with some simple tasks.
See Dragon Anywhere Mobile in Action
Launch videos (in pop up) to quickly get started with Dragon Anywhere Mobile
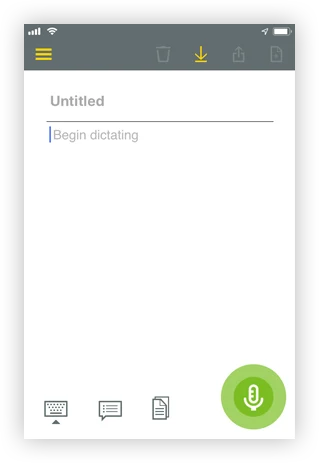
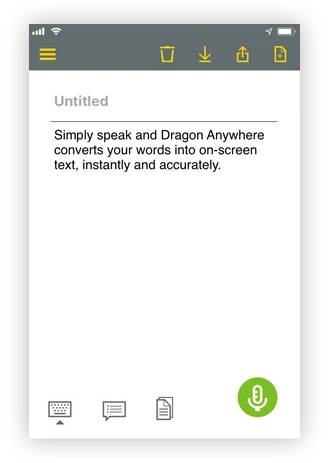
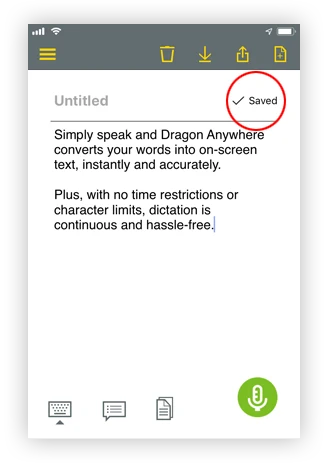
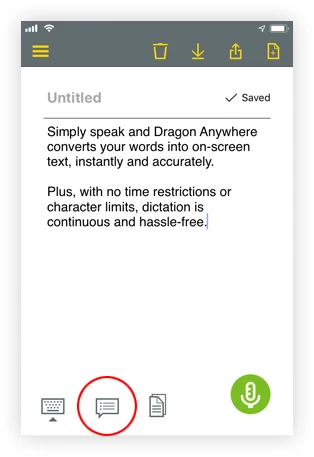
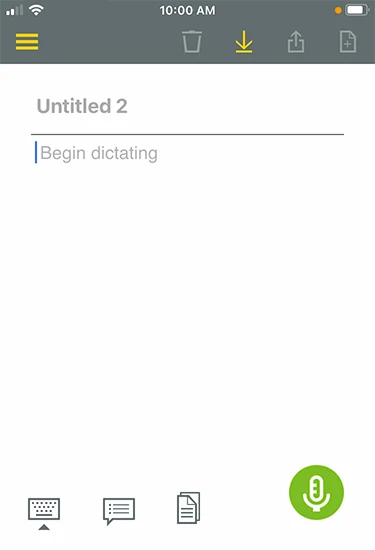
Speech to text in 3 steps
Voilà! Wasn't that easy? And there's plenty more you can do with voice commands. For instance, if you want to start a new document, simply say, 'new document.' Pretty intuitive, right?
Watch this short video to learn more about Dragon Anywhere Mobile and all the powerful functionality available to you.
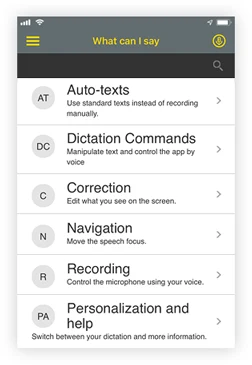
Easily find voice commands
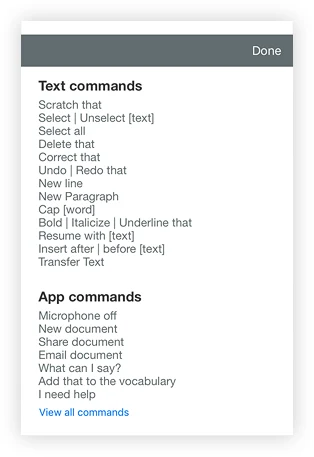
I say?"
And using voice commands is super easy. For instance say, "Select 'Dragon Anywhere Mobile,'" and then say, "Bold that." As fast as you can say it, your text is now in boldface.
Custom words or phrases? Start by saying, “Edit vocabulary”

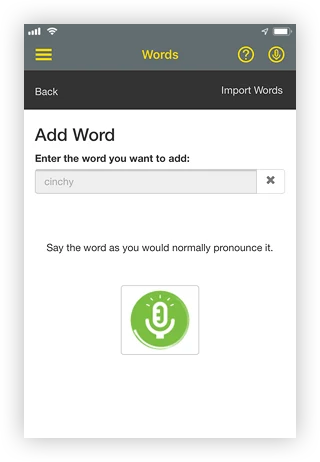
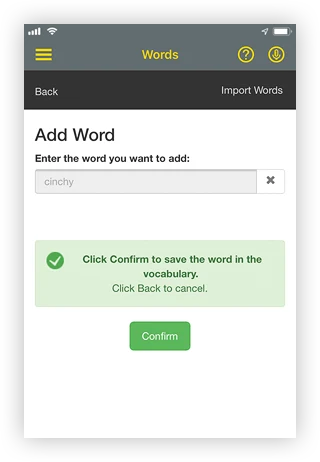
It really couldn't be any more cinchy. Easier still, click the green 'Use Default Pronunciation' button if the pronunciation is straightforward. 'Edit Vocabulary' is ideal for acronyms and industry-specific terminology.
Watch this short video to learn more about adding custom vocabulary.
Link to Evernote on iOS
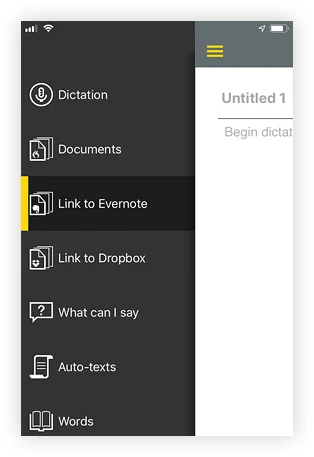

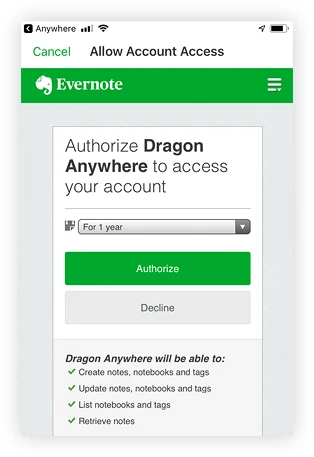
Now enjoy the freedom and flexibility that mobility brings. Just like that you're ready to synchronize notes and documents of any length between Dragon Anywhere Mobile and Evernote on your iOS device. Your work will be readily available to you wherever and whenever you need it. Note-taking has never been so amazing.
Watch this short video to learn more about linking to Evernote
Sync with Dragon Professional
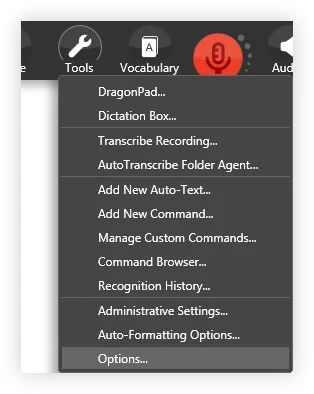
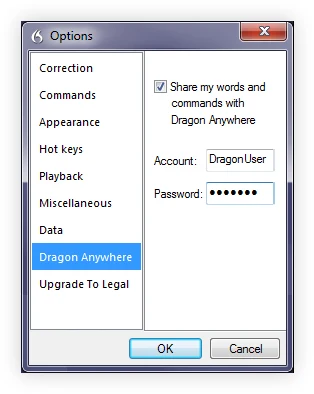
You now have the freedom to switch between Dragon Anywhere Mobile and your Windows PC to complete documents – with all of your customizations and personalizations automatically synchronized. Custom words, industry-specific terms, and auto-text commands are automatically synchronized with your Dragon PC so you can work seamlessly by voice anywhere you go. You'll get more done on the road and in the office. Professional-grade dictation has never been so versatile.
Watch this short video to learn more about linking to Dragon Professional
Quick and easy corrections...
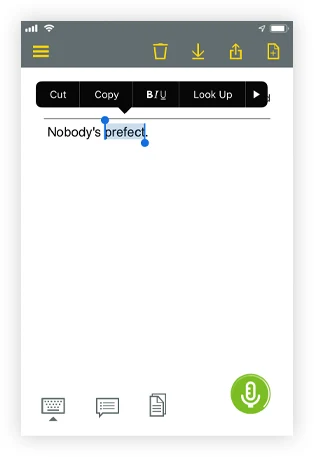
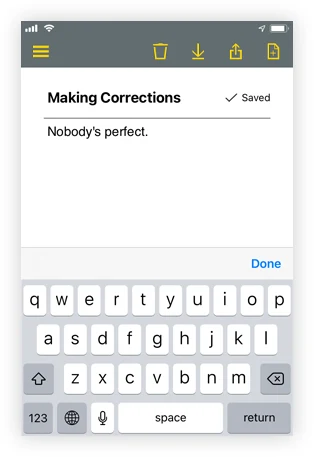
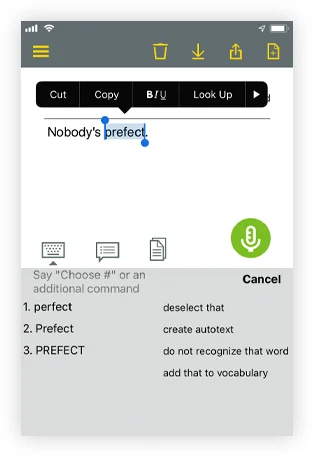
Simple and beneficial. Simple because, well, it's super simple. Beneficial because once you complete your document, the system compares your dictated text to the final text after any edits or corrections. That's when Dragon Anywhere Mobile adapts to your corrections in an effort to eliminate the same mistakes in the future. Learning for improved accuracy is just one of the ways in which Dragon Anywhere Mobile sets itself apart. Additional commands for fixing mistakes are, "Undo that", "Scratch that", or "Press backspace".
Watch this short video to learn more about making corrections.
Select and format text with ease...
Unlike the Dragon desktop products, formatting commands do not automatically apply to the last thing you said. You must select text before formatting it. Once selected, you can easily apply bolding, italics, underlines, color, highlights, and more to your text using simple voice commands. For example, say "Client failed to appear for the hearing on June 15 period." Say "Select failed to appear." Say "Underline that." Your recognized text will appear as such:
Client failed to appear for the hearing on June 15.
Below are a number of ways with which you can select text with ease...
You say:
"Select <text>"
Dragon Anywhere Mobile...
Selects the specified text.
You say:
"Unselect that"
Dragon Anywhere Mobile...
Unselects the previously selected text.
You say:
Select <text> through <text>"
Dragon Anywhere Mobile...
Selects the associated range of text.
You say:
"Select all"
Dragon Anywhere Mobile...
Selects all the text in the editor.
You say:
"Select previous/next"
Dragon Anywhere Mobile...
Selects the previous or next instance of the selected text.
You say:
"Select (previous/next) (first/last) (sentence/paragraph)"
Dragon Anywhere Mobile...
Selects the specified segment of text.
You can select single words, phrases, whole sentences or punctuation marks. The featured selection commands will select the closest instance of the specified text to the left of the current cursor position.
Now onto formatting. Once your text has been selected, formatting can be achieved using any of the commands listed below...
You say:
"Bold that"
Dragon Anywhere Mobile...
Bolds the selected text.
You say:
"Italicize that"
Dragon Anywhere Mobile...
Italicizes the selected text.
You say:
"Underline that"
Dragon Anywhere Mobile...
Underlines the selected text.
You say:
"Set text color to <color>
Dragon Anywhere Mobile...
Changes the selected text to a color: red, green, yellow, blue, black, white, or clear.
You say:
"Set highlight color to <color>"
Dragon Anywhere Mobile...
Highlights the selected text in: red, green, yellow, blue, black, white, or clear.
You say:
"Undo that"
Dragon Anywhere Mobile...
Removes the last text change you made. (This command does not apply to text formatting. Use the "Unformat that" command instead.)
You say:
"Redo that"
Dragon Anywhere Mobile...
Restores the last text change you made with "Undo that."
You say:
"All caps that"
Dragon Anywhere Mobile...
Applies all capital letters to selected text.
You say:
"Cap that"
Dragon Anywhere Mobile...
Starts the selection with a capital.
You say:
"Lowercase that"
"No cap that"
Dragon Anywhere Mobile...
Makes the selection lowercase.
You say:
"Copy that"
Dragon Anywhere Mobile...
Copies the selected text to the clipboard.
You say:
"Paste that"
Dragon Anywhere Mobile...
Pastes the contents of the clipboard to the current cursor location in the Dictation window.
And to remove formatting from any selected text, simply say, "Unformat that." As you can see, it's a breeze using voice commands to select, correct, replace, delete or format both dictated and typed text.
In addition to using voice commands, you can format text by touch. Long-tap the text you want to format, adjust the selection as needed using the text handles and then tap a formatting option on the Edit menu, such as Bold, Italic or Underline.
And where we mentioned deleting, there are a few ways to accomplish this as well. To delete a word, simply select the word and say "Delete word" to remove it from the document. You can also say, "Press backspace" or "Backspace 2" to produce the same behavior as pressing the Backspace key on the keyboard once or twice. Saying "Delete that" or "Scratch that" will delete any selected text or the last thing you dictated if no text is selected.
Watch this short video to learn more about selecting and formatting within your documents.
Controlling the cursor is simple...
You say:
"Go to beginning"
"Go to end"
Dragon Anywhere Mobile...
Moves the cursor to the beginning or end of the text.
You say:
"Go to end of sentence"
"Go to end of paragraph"
Dragon Anywhere Mobile...
Moves cursor to the end of the current sentence or paragraph.
You say:
"Go back"
Dragon Anywhere Mobile...
Returns the cursor to the location before the last formatting or correction command was issued.
You say:
"Go to title"
Dragon Anywhere Mobile...
Places the cursor in your document's Title field.
You say:
"Go to dictation"
Dragon Anywhere Mobile...
Places the cursor in your document's Dictation (body) field.
You say:
"Insert before <text>"
"Insert after <text>"
Dragon Anywhere Mobile...
Places the cursor before or after the given <text>.
So easy it's scary. Your device was engineered with capacitive technology (using touch to affect the electric field that exists between the inner and outer glass) to be highly precise. Unfortunately, your fingers didn't get the memo. So stop fumbling with cursor insertion and simply tell it where to go (instead of telling it where to go #$@!%). And if you do find yourself missing contact with your screen for any reason, you can always say, "Show keyboard" to get back in touch, so to speak.
Dictating punctuation is simple...

While it may take a few minutes of getting used to, dictating punctuation is super easy. For example, to dictate "The deadline for the report is next week, no later than Thursday." you simply say, "The deadline for the report is next week comma no later than Thursday period." You'll also want to pause slightly before and after you dictate punctuation. This way, if you want to insert a comma and not the word "comma," Dragon Anywhere Mobile can more easily determine your intent.
Below is a table of common punctuation symbols as well as their names – i.e., what you say.
’ apostrophe
* asterisk
@ at sign
\ backslash
/ forward slash, slash
` back quote
' open single quote, begin single quote
' close single quote, end single quote
" open quote, begin quote
" close quote, end quote
: colon
, comma
^ caret
– dash, em dash
- hyphen
. dot, period, full stop
= equal sign
! exclamation mark, exclamation point
? question mark
; semicolon
_ underscore
{ US/Canada: left brace, open brace
Other than US/Canada: left curly bracket, open curly bracket
} US/Canada: close brace, right brace
Other than US/Canada: right curly bracket, close curly bracket
[ US/Canada: left bracket, open bracket
Other than US/Canada: left square bracket, open square bracket
] US/Canada: right bracket, close bracket
Other than US/Canada: right square bracket, close square bracket
Other than US/Canada: left bracket, open bracket
) All dialects: right parenthesis, close parenthesis
Other than US/Canada: right bracket, close bracket
< left angle bracket, open angle bracket
> right angle bracket, close angle bracket
- minus sign
+ plus sign
% percent sign
:-( frowny face
;-) winky face
:-) smiley face
's apostrophe ess
... ellipsis
° degree sign
© copyright sign
® registered sign
$ dollar sign, dollar, dollars
€ euro sign
£ US/Canada: pound sterling sign
Other than US/Canada: pound sign
# US/Canada: pound sign, number sign
Other than US/Canada: hash sign, sharp sign
§ section sign
| vertical bar
(tab) tab key
(spc) space bar
Watch this short video to learn more about dictating punctuation.
The 9 basics of dictation success...

Ideal device placement.
For best results when dictating, hold your mobile device 6 to 18 inches from your mouth

Don’t cover the mic.
Locate the microphone and avoid placing your hand or a protective case over it while you dictate.

Dictate normally.
Speak at a normal pace and volume. Try not to yell, talk slowly, or say-one-word-at-a-time.

Say “Microphone Off.”
When you finish dictating, turn off the microphone to avoid Dragon recording everything it hears.

Reduce ambient noise.
To minimize background noise, try connecting your ear bud microphone to your mobile device.

Be sure to keep going.
If you experience errors at first, keep dictating. The system will adapt to your voice in minutes.

Speak clear sentences.
Have an idea of what you want to say, so that you can speak in sentences with minimal pauses.

It’s best not to share.
Dragon adapts to your unique voice. Letting others use your profile will degrade accuracy.

Relax and have fun.
Dragon Anywhere Mobile is the fast and easy way to get more done in less time. So relax and enjoy.
Managing documents made easy...
You say:
"New document"
Dragon Anywhere Mobile...
Saves your current document and creates a new, blank document.
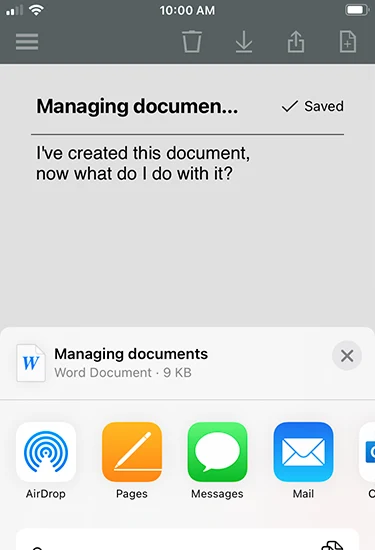
You say:
"Share document"
Dragon Anywhere Mobile...
Opens the Share menu to pick a cloud storage or communication service.
You say:
"Import document"
Dragon Anywhere Mobile...
Loads an RTF, RTFD, DOCX, TXT or HTM file from cloud storage.
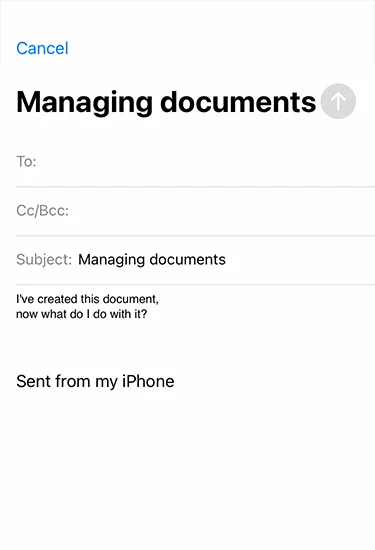
You say:
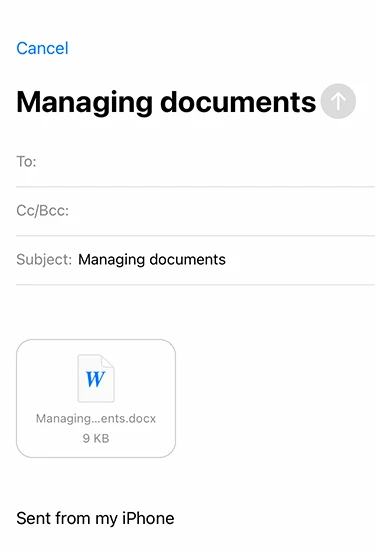
"Email document"
Dragon Anywhere Mobile...
Opens a new email message with your dictated text placed in the message body.
You say:
"Email document as attachment"
Dragon Anywhere Mobile...
Opens a new message with your text attached as an RTF, DOCX or TXT attachment.
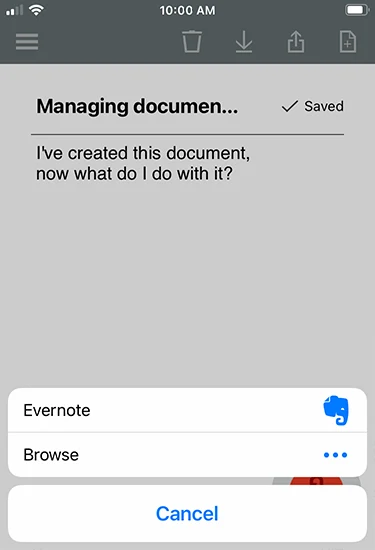
You say:
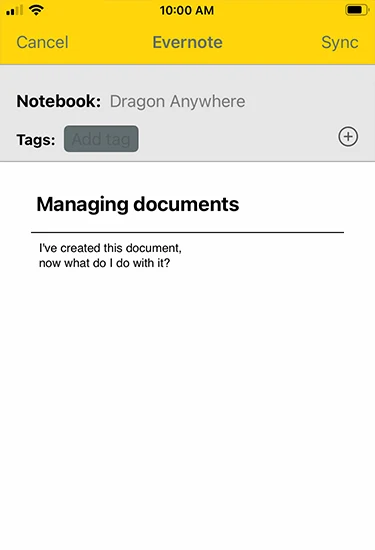
"Save to Evernote"
Dragon Anywhere Mobile...
Saves your dictation as a new note in your Evernote account.
And opening the Documents screen to view and share your documents is as simple as saying, "Open documents." All amazingly simple. Plus, viewing and editing your documents with the keyboard is possible when not connected to the Internet, however sharing your documents via email or cloud storage and communication apps requires an active Internet connection. If you wish to access a document from multiple devices, you'll need to share it to a cloud storage service. Also important to note is that documents you delete on mobile devices cannot be restored.
Watch this short video to learn more about managing your documents.
Save valuable time with auto-texts...
Auto-texts are perfect for inserting your signature block, generating a standard set of instructions, inserting a form that you complete by voice, applying standardized assessment text, and more. You can use auto-texts within the Body field on the Dictation screen. To invoke an auto-text, you simply say the name that you entered in the Spoken Form field when you created it.
Creating auto-texts: To better understand how to create auto-texts, see below...
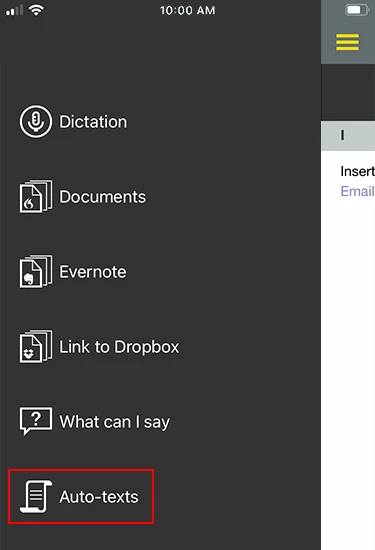
To view or create auto-texts, open the Sidebar and tap Auto-texts.
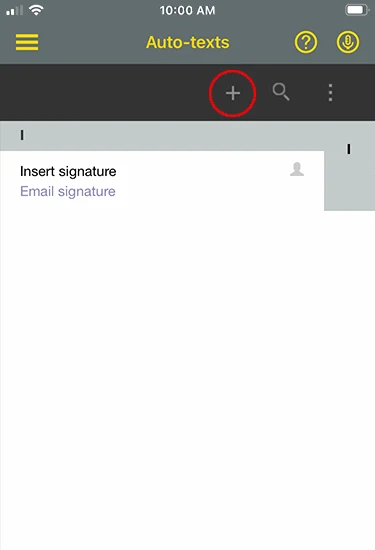
To create a new auto-text, simply tap the Plus icon (+)..
Enter a name (what you'll say to invoke it) and an optional description.
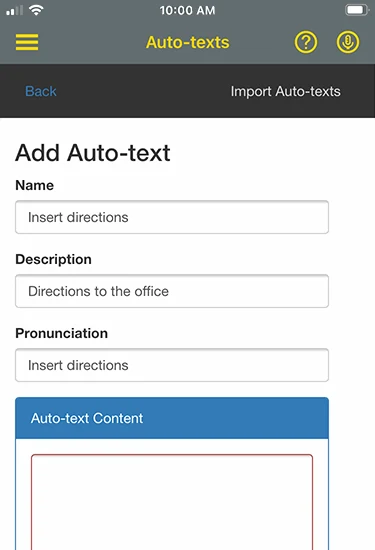
Enter the text you'd like to appear in the Auto-text Content area.
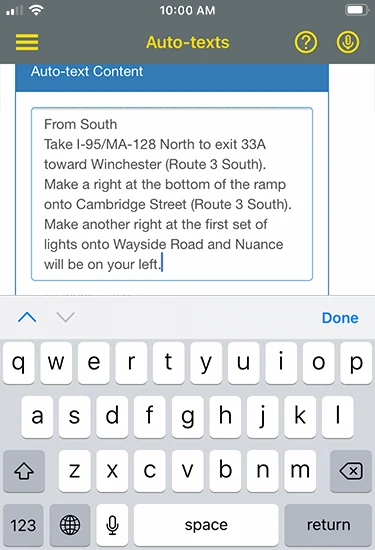
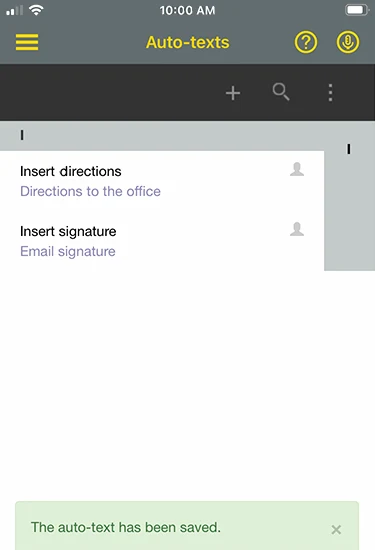
Hide the keyboard by tapping Done and then tap Save.
To invoke the auto-text, you simply say the name that you entered.
In naming your auto-texts, you will want to include an action verb. For example, if the name of your auto-text is "Signature", you may choose to enter the spoken form "Insert signature". Adding an action verb improves the accuracy of auto-texts, particularly when the auto-text name is a single word. Additionally, the optional description can help you or other users understand or remember the purpose of your auto-text.
Now, onto importing auto-texts. Importing auto-texts requires you to first export your auto-texts from your desktop product after which you can import them into Dragon Anywhere Mobile. To do so requires an Internet connection. Exporting your desktop auto-texts can be achieved by following the steps listed below...
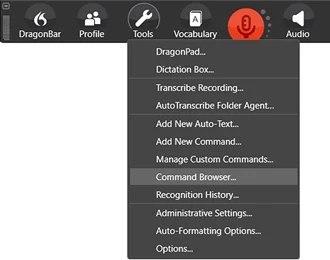
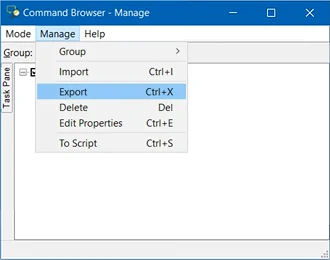
From the DragonBar choose Tools > Command Browser.
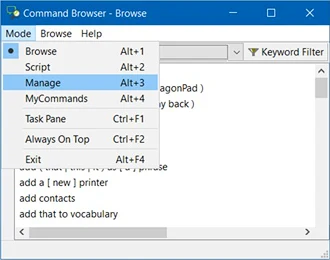
Click Mode > Manage.
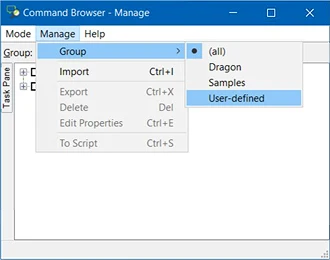
Click Manage > Group to select the group with the text commands you want to export.
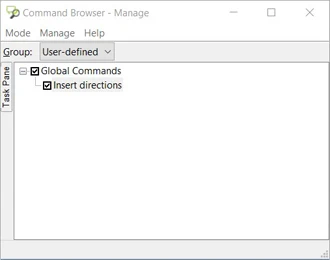
Click on the Plus sign (+) to expand the list to find the command(s) you want to export.

Click the check box to the left of each command you want to export.
Click Manage > Export.
When exporting auto-texts from Dragon desktop products, save the file in .xml format. Be sure to save the file to a location you can access from your mobile device, such as DropBox or OneDrive. If your Dragon desktop product cannot write to the cloud storage location, save the XML file to another location, such as the Desktop and then use Windows Explorer to copy the XML file to your cloud service folder.
Now, back to Dragon Anywhere Mobile and the auto-text import...
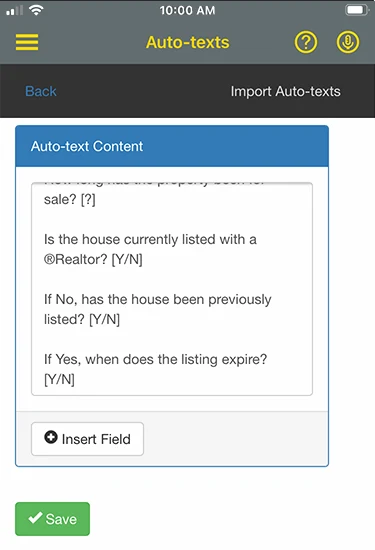
On the Dragon Anywhere Mobile Sidebar, select Auto-texts, tap the Plus sign and then tap "Import Auto-texts".
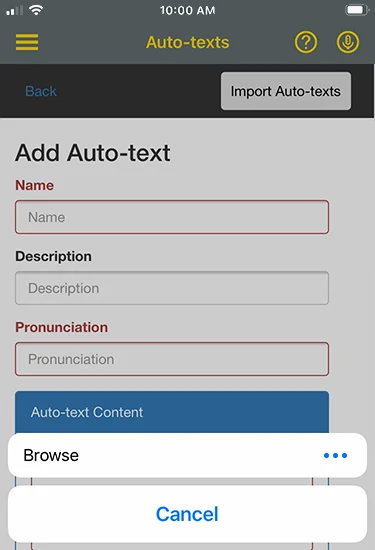
Select the cloud storage service where you saved the auto-texts file when exporting. Note: If you do not see your XML file, choose the "Show All File Types" option in the cloud storage app.
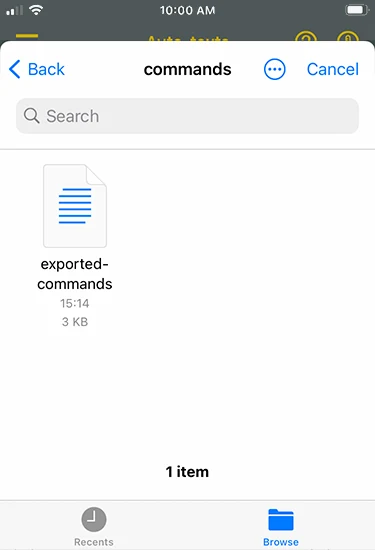
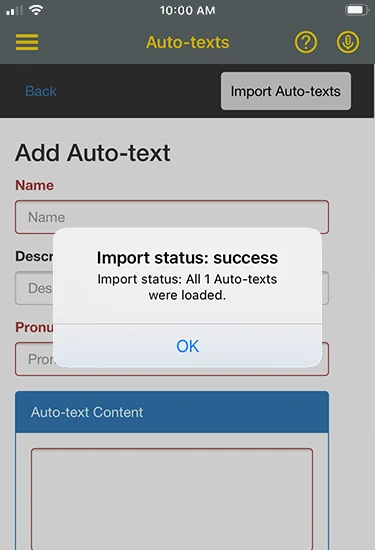
Select the auto-text file you want to import. A confirmation message appears with details on which auto-texts were imported successfully and if any errors occurred.
When importing auto-text commands from Dragon desktop products, errors may occur. Below are explanations for the most common errors:
Unsupported command types
Dragon Anywhere Mobile supports auto-text commands. However, Step-by-Step, Macro Recorder, and Advanced Scripting commands are not supported. If you select an XML file to import into Dragon Anywhere Mobile that contains these unsupported command types, they will be ignored.
Text Formatting
Dragon Anywhere Mobile supports plain text auto-text commands. If you select an XML file to import that contains rich text formatting, Dragon Anywhere Mobile will select the plain text version of the command contained in the XML file.
Watch this short video to learn more about creating and using auto-texts.
Make information collection simple...
You can add fields to the content of an auto-text to hold the place of information that varies from one document to another. Later, when you use this auto-text command, you'll be able to insert a specific value for each field (or accept the default values). Some examples of where auto-text forms come in handy are: form letters, mailing labels that use fields for each address element, routine notices that use fields to specify important upcoming events or deadlines, invoices that use fields to specify cost breakdowns and penalty surcharges, and more.
Creating auto-text forms: To create an auto-text form, simply follow the steps below...
To create your auto-text form, simply open an existing auto text or create a new one.
If editing an existing auto-text, simply choose it from the list and click the edit icon to open.
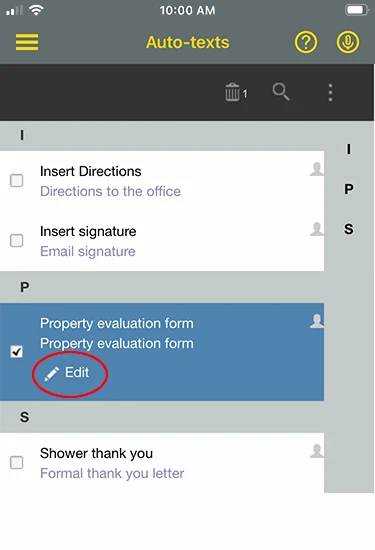
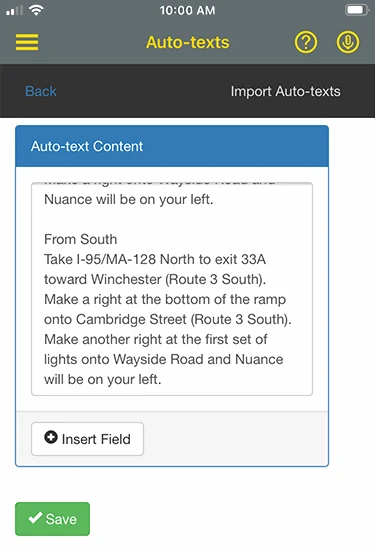
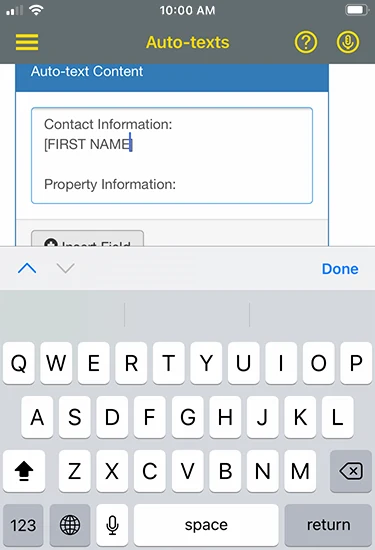
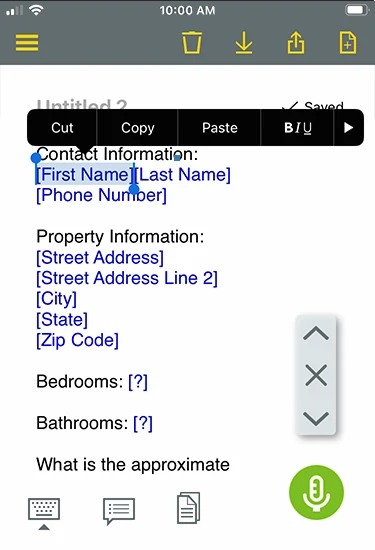
By tapping the Insert Field button, the "[ ]" characters will appear where the cursor rests.

Enter a description or default value for the field, such as "[FIRST NAME]" or leave the field empty.
Repeat the process for all required fields noting that the brackets may be manually typed as well.
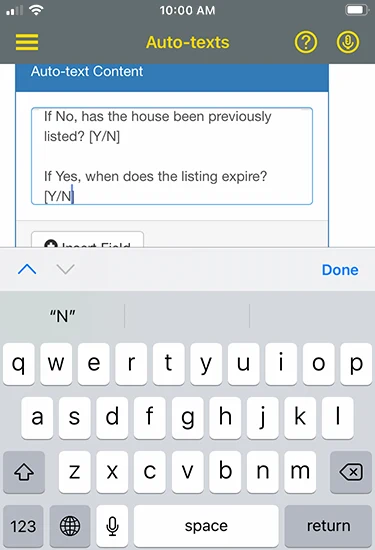
Once you've added your required fields, hide the keyboard by tapping Done and then tap Save.
To invoke an auto-text, you simply say the name that you entered in the Spoken Form field when you created it.
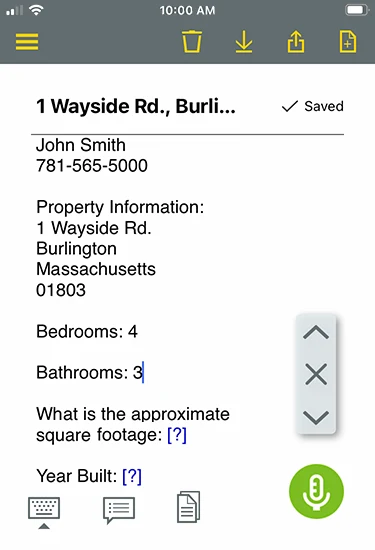
Now, onto navigating auto-texts forms. Once you have opened a document and inserted your auto-text, you can use voice commands to easily move from field to field and to insert specific field values.
Once the auto-text form invoked, the first form field will be selected by default.
You can navigate the form fields by voice, by saying "Next field" and "Previous field".

To accept a field's default value, simply say "Accept default" when the field is selected.
It really couldn't be easier. Auto-text forms are a quick and easy way to use your voice to gather valuable information fast.
Watch this short video to learn more about creating and using auto-text forms.
Amazing speech recognition accuracy
Edit, format, select and navigate your text
Increase accuracy with customized words
Sync your mobile device with your desktop
Save time with shortcut steps using simple voice commands
Easy document management